Showing posts with label bread. Show all posts

Thursday, September 24, 2015

Breaking the Fast, and Breaking into Autumn with Whole Wheat Millet and Oatmeal Bread


Yesterday was Yom Kippur. It's not the easiest day to be a Jew, and it's especially not the easiest day to be a rabbinical student. Most of my classmates, like me, fasted while conducting services or serving in other leadership roles. I actually had a good bit less to do than many of my colleagues. The Hillel where I work only holds Kol Nidre (evening) services. On Yom Kippur morning I song led for a children's service and was then able to go to a synagogue of my choice for a few hours of adult services. Then it was back to my Hillel campus for an afternoon study session, ne'ilah (concluding) services, and break fast. The worst part of my day by far: realizing at 4:30 that we'd forgotten to purchase a few necessary items for the break fast. Y'know what's not fun? Grocery shopping on Yom Kippur. Nonetheless, it was a good day and I feel really awesome going into this new year.

Yesterday was also the Equinox and the First Day of Fall! I adore that the timing lined up like that. It's so cool to have been able to start a new season in the secular calendar at the same time as this new year begins in earnest with the end of the High Holidays.

Fall to me means many things. I love pumpkin spice lattes as much as the next person, but fall also means that it's legitimately time to bake. Summer baking always feels a little less awesome than autumn baking. Feeling a slight, crisp chill in the kitchen as I pre-heat the oven makes stuff taste better. It just does.

I grew up with parents who baked fresh bread. Not all the time-- we had plenty of store-bought-- but enough that it wasn't a rare occurrence. My folks had (and still have, I think) a falling-apart copy of the Tassajara Bread Book. They grew up in the Bay Area, not far from the monastery where Edward Espe Brown lived and baked. The original edition made huge recipes-- 4 loaves at a time-- and my parents did the same. I have strong memories of my dad punching down what seemed an impossibly large amount of dough in an impossibly large ceramic bread bowl.

The year that I graduated from college, the book, which had been difficult to find in stores for some time, was published in a new edition, and my parents bought me a copy. It was the beginning of my love for bread-baking, and even though I've ventured into many a sort of loaf since, I always find myself coming back to Tassajara. It's simple and wonderful, and everything about it feels like home.


Mr. Brown provides an excellent base recipe (cut down in the new edition from 4 loaves to 2) for yeasted whole wheat bread, but he also provides an amazing assortment of variations on that theme. I don't typically follow a straight-up recipe anymore. Instead, I riff off of it. This isn't a task to undertake on an "out of the house from dawn til dusk" day, but it's perfect for a "I need to do a few small things that take an hour or less each" day.  So, basically, this won't have you standing in the kitchen for hours, but it will have you standing in the kitchen for 5-20 minutes several times over the course of 5-6 hours.

Tassajara Yeasted Bread (with Emily's modifications)

Ingredients:


Yes, King Arthur is better. There, I said it. 
Stage 1:

  • 3 cups wrist-temperature water
  • 1 1/2 TBS active dry yeast
  • 2 TBS honey
  • 1 TBS maple syrup (you can also use 3 TBS of one or sub in some brown sugar or molasses)
  • 1 cup dry milk (omit for a vegan loaf)
  • 3 cups whole wheat flour
  • 1 cup unbleached all-purpose flour
  • 1 1/2 cups millet + 3/4 cup hot water
Stage 2:
  • 4 TBS salt
  • 1/3 cup oil
  • 1 cup whole wheat flour, plus an additional 1-2 cups for kneading
  • 1/2 cup oats
Stage 3:
  • (optional) sunflower seeds or nuts to sprinkle on top of the loaves
You'll also need a large bowl for mixing, a counter space for kneading, and 2 loaf pans. While these loaves probably could be baked free-form on a baking sheet, I've never tried it. If you do, let me know how it goes!

Procedure:
Stage 1: (approximate hands-on time: 5-10 minutes)
  • Put the water into your large mixing bowl and sprinkle the yeast on top
  • Mix in the sweeteners and the dry milk
  • Add the flour one cup at a time, stirring briefly after each. You can use more white flour or all whole wheat. I find that using a little white flour helps the dough come together a little more without sacrificing any of the delicious whole wheat flavor.
  • After all 4 cups are in, beat vigorously for about 100 strokes.
  • Cover the bowl with plastic wrap and set aside to rise for 45 minutes. The dough will likely get very very bubbly.

  • Place the millet into a bowl and pour the 3/4 cup of hot water on top. Let soak until stage 2.
Stage 2: (approximate hands-on time: 10-20 minutes)
  • Fold in the salt and the oil, followed by the soaked millet. Try not to add any of the water that the millet didn't soak up!
  • Stir in the oats and 1 cup wheat flour. 
  • Dump the dough onto the counter top and dust liberally with flour. 
  • This is where the fun begins. Kneading this is not like kneading challah or pizza dough. There are no eggs to make this supple. There is very little white flour. Whole wheat flour takes work. You will dump a shaggy mess onto the countertop. It will soak up flour by the handful. It will fall apart. It will get everywhere. Yes, you will have to sweep your floor. And possibly mop. There will be millet and flour on the stovetop, under the toaster, and quite possibly in your hair. Keep kneading, feeding the dough as much flour as it needs but not any more than that. Small little finger handfuls are best. In maybe 5 minutes, the dough will begin to behave as though it's entertaining the possibility of becoming a cohesive unit. You should be able to ease up on the flour input, although you'll still need to feed it a little. Keep kneading for another 5 minutes or so. At some point, the dough will stop being sticky and become merely tacky, digging into your hands without coming along for the ride when you move your hands. The dough will begin to smooth out and take direction. 
  • Oil the bowl and place the dough into it, turning it so that all the surfaces get oily. Cover the bowl with plastic-wrap (you may want to also oil the side of the plastic wrap that will be in contact with the bread) and a dishtowel, and place somewhere nice to rise. 
  • In 50-60 minutes, or when it's doubled in size, uncover the bowl and punch the dough down. 
  • That's only one punch. What will a couple dozen do??
      Ohhh it'll do that. 
    Not so pretty, but it did its job!
  • Re-cover the bowl and let rise for 40-50 minutes, until it's doubled again. 

Stage 3: (approximate hands-on time: 10-15 minutes)
  • Cut the dough in half and shape it into loaves. To do this:

    • Cut the dough in half, shape each half into a ball and let it sit for about 5 minutes
    • I said "try." I realize that this looks more like a mountain than a rectangle.
    • Take one half of the bread and knead it for about a minute, flattening it out slightly towards an ovular/rectangular shape. If it's still quite sticky you can add a tiny bit of flour, but try not to. You don't want to dry it out. 
    • Roll the dough into a log shape, placing the "seam" on the bottom. Use the back of your hands to flatten out the top and even out the ends into square-like shapes. 

    • Place seam-side up into a well-oiled loaf pan, flatten the dough with the back of your hands again, tip out of the pan, flip so that it's seam-side down, replace in pan, and flatten the dough again. 
    • Repeat for 2nd loaf. I know this sounds confusing, but don't worry too much about it. Even if you don't follow these instructions to the letter, you'll likely end up with an attractive and delicious loaf. :)
  • Cover the loaves with plastic wrap and a kitchen towel and let rise 20-25 minutes. Pre-heat the oven to 350°F
  • Make 3-5 half-inch deep slits in the top of each loaf to let steam escape.
  • Sprinkle the loaves with sunflower seeds (you may have to press them very lightly into the loaves for them to stay)
  • Bake for 50-60 minutes, until tops are golden brown and the bottom of the loaf sounds hollow when rapped. 
  • Remove carefully from loaf pans (a butter knife slid around the edges of the pan can help to loosen the loaves) and let cool on a wire rack. You shoooould let the loaves cool for at least an hour before cutting in order to get clean slices. But you could also cut a slice or two right away and douse them with butter and it might be the most delicious thing ever. Just a thought. 
This bread is fantastic plain, makes incredible grilled cheese, works nicely for PB&J, and really I'm sure would be quite delicious in a variety of circumstances. Go bake and see! Fasting is over and autumn awaits!


What? Of course I didn't cut into the loaf as soon as I took it out of the oven. How silly would that be?


Wednesday, March 28, 2012

Daring Bakers: Dutch Crunch Rolls!

Sara and Erica of Baking JDs were our March 2012 Daring Baker hostesses! Sara & Erica challenged us to make Dutch Crunch bread, a delicious sandwich bread with a unique, crunchy topping. Sara and Erica also challenged us to create a one of a kind sandwich with our bread!


Yummy!


I know what you're probably thinking. Dutch what? Until this month I'd never even heard of this crunchy bread, which is, according to Wiki at least, actually of Dutch origin. In the states, it's supposedly very common in San Francisco, which is funny, as I spent tons of time out here as a kid and live here now and don't remember ever encountering it. Whatever the circumstances, this is a fun and super easy bread to bake, and it comes out looking wonderfully crispy and appealing. The secret is all in the topping, and the secret to the topping is rice flour. 
So, go ahead! Make some bread! Or rolls, as I liked.

As Dutch Crunch bread is typically used for sandwiches, we were encouraged to come up with a filling or two. I think that I'd really enjoy a black bean burger with some sharp cheddar and pico de gallo. The bread itself is pretty plain, so dressing it up with some spicy fillings would be nice. If I still ate meat, I'd honestly probably go for something like turkey.

So, without further adieu, I give you recipes for both the soft white roll I used as my base, and the topping that I spread atop it. I halved both recipes, both because I thought I'd rather start with three rolls in case something went terribly wrong, and because I've been baking a lot of sourdough lately and didn't need the extra bread.


Soft White Roll

Servings: Six sandwich rolls
Ingredients
1 tablespoon (1 packet) active dry yeast
¼ cup warm water (No need to use a thermometer – it should feel between lukewarm and hot to the touch).
1 cup warm milk (105-110º F)
1½ tablespoons sugar
2 tablespoons vegetable oil (plus additional olive or vegetable oil for greasing bowl during rising)
1½ teaspoons salt
Up to 4 cups all purpose flour
Directions:
1. In the bowl of an electric mixer or large mixing bowl, combine yeast, water, milk and sugar. Stir to dissolve and let sit for about 5 minutes (The mixture should start to bubble or foam a bit and smell yeasty).
2. Add in vegetable oil, salt and 2 cups of flour. Using the dough hook attachment or a wooden spoon, mix at medium speed until the dough comes together. 
Rising dough
3. Add remaining flour a quarter cup at time until the dough pulls away from the sides of the bowl, as shown in the photo below (For us, this usually required an additional 1½ to 2 cups of flour).
4. Turn out onto a lightly floured surface and knead for about 4 minutes, until smooth and elastic.
5. Place in a lightly greased bowl and cover with plastic wrap. Let rise for 1 hour, or until doubled (or more) in size 
6. Once the dough has risen, turn it out onto a lightly floured surface and divide it into 6 equal portions (if you’d like to make rolls) or 2 equal portions (if you’d like to make a loaf) (using a sharp knife or a dough scraper works well). Shape each into a ball or loaf and place on a parchment-lined baking sheet (try not to handle the dough too much at this point).
Resting, formed dough
7. Cover with plastic wrap and let rise for 15 minutes while you prepare the topping.
8. Coat the top of each roll or loaf with the topping as described above. While the original recipe recommends letting them stand for 20 minutes after applying the topping, I got better results by putting them directly into the oven.
These look like biscuits and gravy to me....
9. Once you’ve applied the topping, bake in a preheated moderately hot 380ºF/190°C/gas mark 5 for 25-30 minutes, until well browned. Let cool completely on a wire rack before eating.


Dutch Crunch Topping (yields enough for 6 rolls)

Do not make this topping ahead of time, but just as you need it - about 15 minutes before you put the bread in the oven.

Ingredients
1 tablespoon (1 packet) active dry yeast
1/2 cup warm water (105-115º F)
1 tablespoon sugar
1 tablespoon vegetable oil
1/4 teaspoon salt
3/4 cup rice flour (white or brown; NOT sweet or glutinous rice flour) (increase to 1 cup or more for home-made rice flour)


Dutch Crunch topping!
Directions:
1. Combine all ingredients in a large bowl and beat with a whisk; beat hard to combine. The consistency should be like stiff royal icing – spreadable, but not too runny. If you pull some up with your whisk, as shown below, it should drip off slowly. Add more water or rice flour as necessary. Let stand 15 minutes.

2. Coat the top of each loaf or roll with a thick layer of topping. The best way is to just use your fingers (or a spoon) to glob it on. You should err on the side of applying too much topping – a thin layer will not crack properly.
3. Let stand, uncovered, for any additional time your recipe recommends. With the Soft White Roll, you can place the rolls directly into the oven after applying the topping.
4. When baking, place pans on a rack in the center of the oven and bake your bread as you ordinarily would. The Dutch Cruch topping should crack and turn a nice golden-brown color.


Sunday, October 30, 2011

Better Late than Never- Daring Bakers' Povitica


Hey Folks. Long time, once again, since my last post. I'm gonna try and be a better blogger, I promise.

Last month, I finally joined "The Daring Bakers." It's a really fun blog list that gives little baking addicts, like myself, an excuse to bake one particular item every month. Sometimes it's a traditional but hard-to-make item like last month's croissants. Other times, it's a not-as-hard-to-make but slightly rarer item like this month's: Povitica.

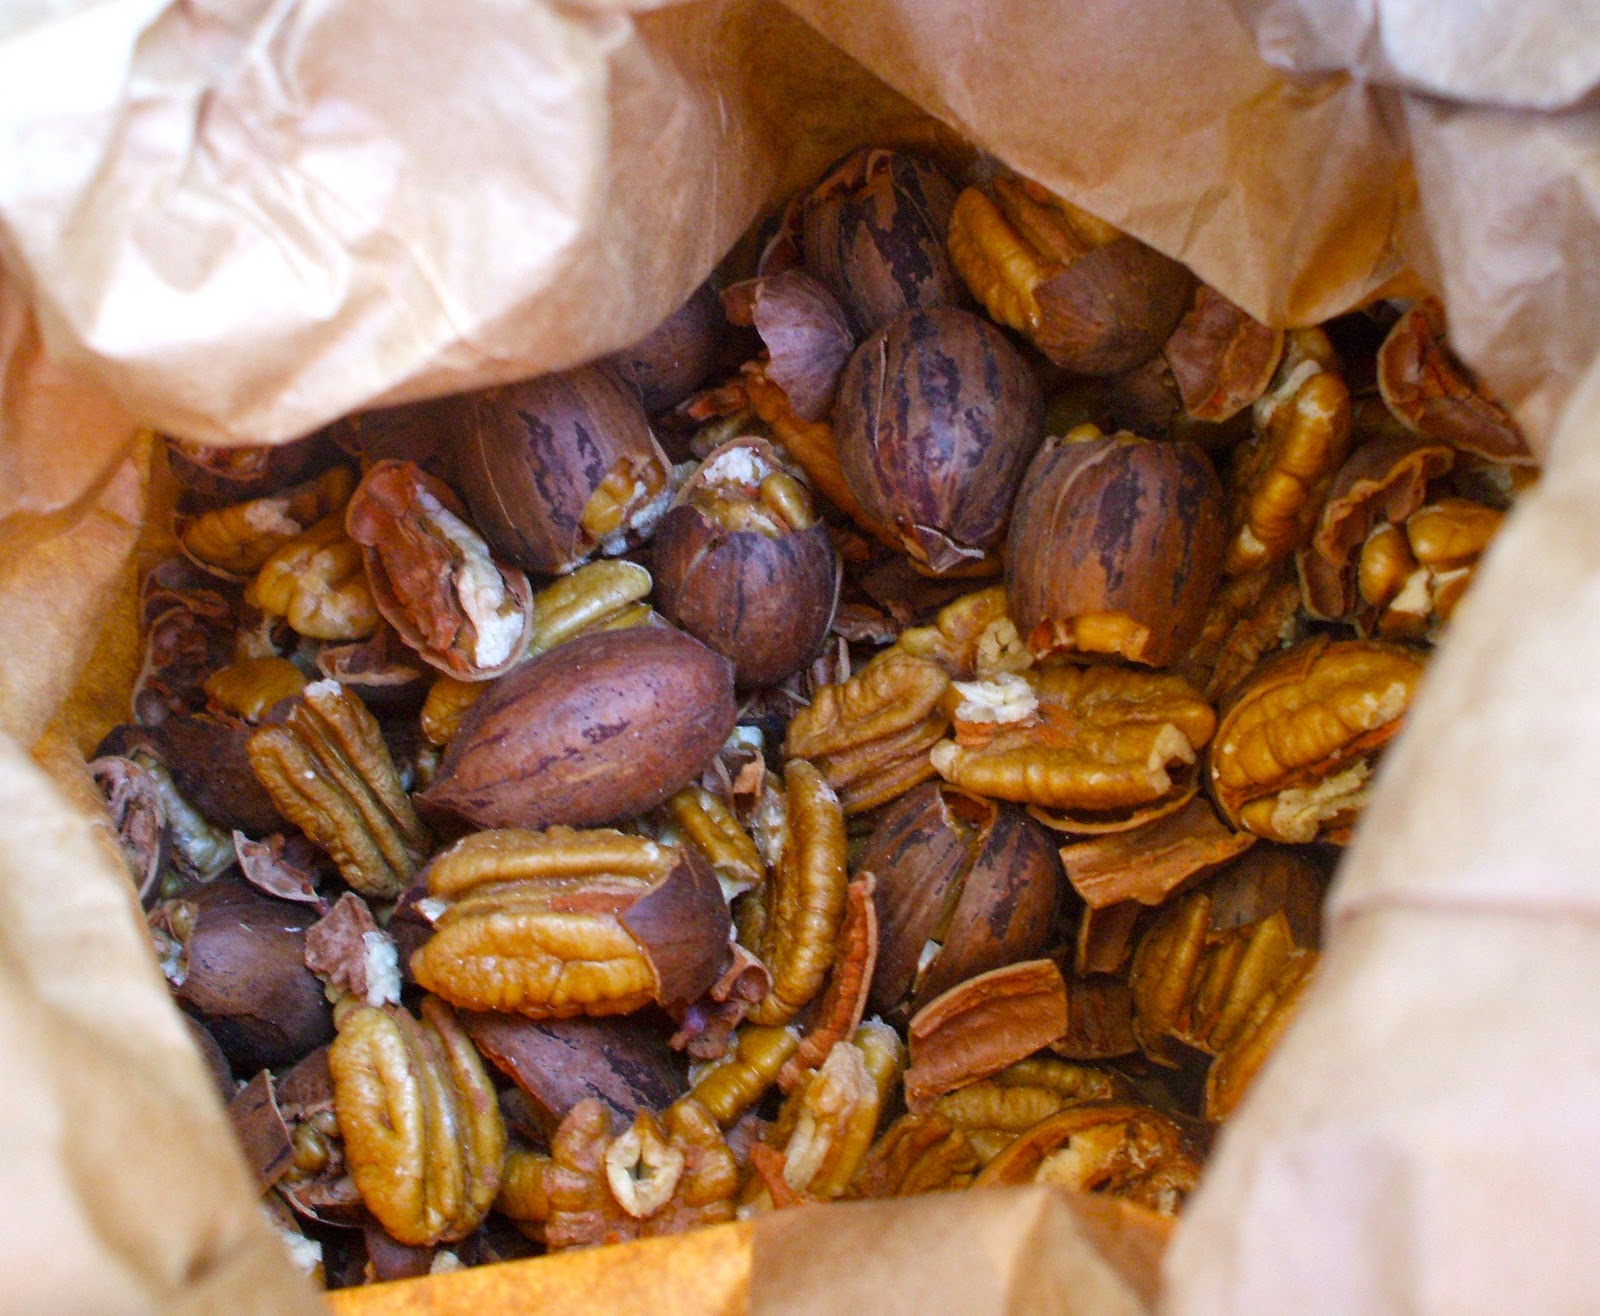
Povitica is an Eastern European, filled, yeasted coffee cake, somewhat akin to a babka. There are definitely differences, however, and both are fun to make in their own way. For this month's "challenge," we daring bakers were asked to bake one povitica with a traditional walnut filling, and we were welcome to play around with other fillings of our own. I opted for a variation on the walnut with a southern twist-- praline. (This year's pecans are just now being harvested, and we picked up a bag att yesterday's farmers' market.) All in all, the potivica was a really fun project...although I don't think it could ever really replace chocolate babka.

The main recipe used by all daring bakers can be found here. I made a few small changes. I used skim milk mixed with a touch of cream in place of the whole milk, and when I rolled out the dough, I sprayed it with pam rather than putting more butter on top. I also used salted butter and decreased the salt in the recipe slightly.


This is my filling recipe, prepared the same way as the traditional:

Praline Filling Ingredients (for 1 loaf)
-1 3/4 c. ground pecans
-1/4 c. milk 
-1/4 stick butter
-1 beaten egg yolk
-1/2 c. packed brown sugar, plus 1-2 TBS white sugar
-1/4 tsp. butter extract


Potivica is prepared much like any other yeasted sweetbread at first. Yeast, milk, eggs, sweetener, oil or butter, flour, kneading...a good recipe for yum. 


After the rising, it's rolled out to a small-pizza sized round, and then really rolled out until it's almost paper-thin. 

(As you can see, I didn't quite get that far.)


After the rolling, it's time for the filling. I actually ended up using my hands for this, after I spooned it on, to make it nice and even. 


The loaves are rolled up, carpet-style, and then twisted in upon themselves in the loaf pans. I didn't get mine quite as swirly as I'd hoped, but I was worried I'd break them if I kept tugging. 


After the loaves come out, they have to cool for quite awhile or they'll turn to crumbly gook when sliced. 


Mmmmmmm....potivica. 

Friday, September 23, 2011

Shabbat Shalom! (Challah, Obviously)

 It's Friday evening here in Georgia, and the sun has tucked itself away momentarily behind a silvery cloud turned to gold at the edges (the sun may try to be inconspicuous, but, well, it's the sun). It's been a good day-- a very good day, in fact, as I just found out I've been hired!

When I got back to the States two months ago,  I took a few weeks to decompress before beginning job applications, and then, once I did, nothing worked out. I cobbled together a few little things-- a tutoring job and a Hebrew School gig-- but those were more for joy than for money (I was actually under the impression that the Hebrew School would be volunteer until I started teaching). Anyway, after a good month and a half of undesired unemployment, I'd pretty much resigned myself to the fact that none of the places I'd applied for nice part-time work were going to hire me, and I was ok with that. Between my two mini teaching jobs and my volunteer research for the museum, as well as participation in choir, almost daily workouts, and grad school applications, I felt mostly content.

So I was very surprised, an hour ago, when the very first restaurant I applied to called me back. I'm filling out paperwork Monday and starting training Tuesday. I'm a bit nervous, I must admit, about how this is going to affect my mostly-established-and-very-comfortable schedule. What a silly first-world, fortunate problem that is. Man, am I not in China anymore. Heck, I'm not even in unemployed America anymore, or won't be next week. I'll be getting experience as a server on a part-time basis, and I'll still get to do all the fun (and not so fun but necessary) stuff I've gotten involved with. I should be more nervous that I will drop dishes full of food on the people who will be tipping me, I suppose. Anyway, that has very little to do with this.

This is what one's hand is prone to look like after kneading challah. But it's worth it, I promise. 
Challah, for the uninitiated, is a traditional Jewish bread. It's a bit on the richer and the sweeter side than one's average loaf, but it's certainly nowhere near scones or muffins or banana bread or anything. It's a dense bread that's delicious plain, wonderful smeared with butter and honey, and stupendous turned into french toast. Challah is often eaten on shabbat, the Jewish Sabbath, which falls every Friday night along with the setting sun. Today happens to mark the first shabbat of autumn and the last before Rosh Hashanah (the Jewish New Year).

My family isn't devoted to a particular recipe. I'm partial to Mollie Katzen's, while my mother prefers...the bread machine book's. I will admit that there are advantages to the bread machine book's, like using the initial mix of orange juice and water, but challah to me just seems the sort of thing that must have a recipe attributable to somebody (preferably a great-great-great grandmother), and the bread machine book doesn't make the cut. Nonetheless, it wouldn't be me if I didn't make some small modifications to the original, so here you go. Emily's challah, mostly courtesy of Mollie Katzen, in all its glory. 

Ingredients (for one braid--can be easily doubled)
-1 1/4 cups of wrist-temperature water (or a mix of water and orange juice)
-1.5 tsp. yeast
-2 TBS oil or melted butter (butter is better, I think)
-1/4 c. sugar or honey (honey is oh-so-much better, if available)

-1 egg, plus about half another egg, for glaze

-1.5 tsp. salt
-a dash of cinnamon

-1/4 cup raisins (optional)

-4-5 cups all-purpose flour (can use up to 2 cups whole wheat, if you like, but I usually use only 1 cup, if any)
-poppy or sesame seeds for sprinkling


Procedure
-Put the water into a large bowl and sprinkle in the yeast. Then whisk in the oil or butter, sugar or honey, egg, cinnamon, and salt until nicely blended. If you're using raisins (and I can honestly go either way on that--I did today just because I hadn't for awhile and my sister, who hates them, is away at college), stir them on in. 
-Stir in the flour one cup at a time, moving from a whisk to a wooden spoon. When you've added 4 or 5 cups, the dough should be ever-so-slightly sticky. Knead it in the bowl for a few minutes, adding flour as necessary, until it's smooth and elastic. Then wrap it up in saran and let it double. This'll take 1-1.5 hours.


The challah looked quite happy to be in the world, and so did the green, green grass of the backyard. 
-After the dough's risen, you can stick it in a loaf pan and bake it like any other bread, but that's rather unusual for challah. Challah is nearly always braided. So, if you want to do this properly, cut the dough into thirds and roll each into a ball. You may have to redistribute the dough a bit to make the balls even. Roll each ball into a rope. If they're not approximately the same length, just pinch the end off of one and firmly stick it onto another. 

-Pinch the ends of the ropes together. Braiding begins from the middle and stays in the middle. If you know how to braid hair, you're in great shape. Just do that. If not, stick with me here. Take the middle rope, and bring it over the left rope, as in the picture below. Then, take the right rope, and bring it under the new middle rope (the original left rope), as in the second picture below. Then, take the new left rope (the original middle rope), and bring it under the new middle rope (the original right rope). You're basically going under whatever rope happens to be the current middle rope, alternating left to right and back again. But I know that sounds confusing, so I have creating, for your viewing pleasure, my very first food blog video (which has not been at all edited in any way, shape, or form, in case that isn't plainly obvious). 


-Once the braid is finished, place it on a greased baking sheet, cover with plastic wrap and a dish towel, and let rise for another hour. Shortly before the hour's up, preheat the oven to 375°F and beat an egg with a pinch of salt (you won't need the whole egg, so plan on omelets for dinner?).
-Before putting the bread in the oven, brush it generously with the egg wash and sprinkle with poppy or sesame seeds. You don't have to do this, strictly speaking, just as you don't have to braid the loaf, but not doing it is kinda akin to not putting lime in a gin and tonic. It just doesn't work as well. 
-Bake for 30-45 minutes, depending on your oven, until the loaf is golden-brown and sounds hollow when tapped on the bottom. Cool on a rack. 


Shabbat Shalom!

Thursday, September 8, 2011

Sourdough-- Bittman Style

Well, hello everybody, and welcome to the chronicle of my cooking and baking adventures down here in Georgia. I could, I suppose, begin with some sort of self-introduction, but I assume that most people reading this already know me, and that those who don't are far more interested in recipes than in revealing personal tidbits. I will say that what you're most likely to find in this blog is a mix of recipes penned by my favorite chefs and recipes designed on the fly as I satisfy my culinary cravings and curiosities. I love to cook, but my deepest food passion is for baking (hence the blog title). It seems only fitting that I begin with bread. This bread, to be precise:


This bread is the sourdough loaf I learned about in Mark Bittman's The Art of Cooking Everything Vegetarian. I'm a pretty big fan of Mark Bittman's (he's a food writer for the NYT; if you haven't checked him out, you should), but I'd never read anything of his not linked to the Times until stumbling upon his cookbook at the library last week. 

Sourdough is an elusive creature, made thus by the fact that it relies on a starter. I have dreams of one day sneaking into the bustling kitchen at Boudin's, snagging a fistful of that century-old, solid-gold mass of sour goop and secreting it back to my own refrigerator. But, considering that Boudin's is in San Francisco and I am here, I've had to settle for less. Which is just as well, considering that stealing Boudin's starter would likely lead to unpleasant consequences. 

Sourdough starter isn't very difficult to make, but it does require time and patience and luck. In fact, making a loaf of sourdough bread start to finish is a several-day process, because the starter itself needs a few days prior to mixing the bread dough, and then there's typically a long rising period. And then, even after all the hard work and the waiting and waiting, there's no knowing how sour your bread will taste. Starters certainly do age well, as long as they're fed, but it might take a few weeks, or even longer, before breads baked with it have the traditional sour taste I associate with so many wonderful California bakeries. Even then, it might not match up ( Northern California yeast is just really quite excellent), but that shouldn't stop you from trying! Sourdough is exciting! Each starter, and thus each loaf resulting from it, is a unique concoction of taste and texture dependent not just on the commercial yeast you begin with but on the natural yeasts hanging around your environment. This is most certainly a locally-powdered bread. So, have at! At the least, you'll get a beautiful , deeply-flavored loaf lovely for sandwiches and smears of butter. 

We begin with the starter:

Ingredients
-1.5 cups bread flour
-1/8 tsp. yeast (yes, that's all)
-1 cup wrist-temperature water

Procedure: Combine flour, yeast, and water in a large bowl, mix with a wooden spoon, cover loosely (so natural yeasts can join what's already inside), and tuck into an out-of-the-way spot. Stir every 8-12 hours and wait patiently for it to get bubbly and develop a bit of a sour smell. In most climates, this'll likely take 2-3 days. In Georgia summer, it took one. 

Once the starter's mature, you can begin the bread. But, if you aren't going to be baking right away, stick the starter in the fridge. When the time to bake comes, you're ready for step two: Bread Baking Eve.

Ingredients
-starter
-2 cups of bread flour (I sometimes use part all-purpose whole-wheat)
-1.5 cups wrist-temperature water

Procedure: If you've made the starter according to Bittman's directions, you use all of it during this step (don't worry-- you'll get a lot of it back later). Dump the starter into a large bowl and mix in the flour and water until smooth. Cover the bowl with plastic wrap and let it sit at room temperature for at least 6 hours or overnight. It will get bubbly and foam a bit. And do make sure you use a large bowl--I didn't the first time and ended up with the blob all over my counter. Whoops. 

Sleep well, and dream of good bread. When morning comes, your bowl should look something like this. (do excuse the quality of my photographs. I have a very temperamental camera that I hope to replace soon.) 
Ingredients
-1 cup bread flour
-1 cup rye flour (if you don't have it, all-purpose, bread, or whole wheat will be fine. Again, it'll affect texture and flavor to some extent, but I've baked with and without rye flour and it's good both ways)
-1/2 tsp. yeast
-2 tsp. salt

Procedure: 
1) Transfer half of the starter/flour mix to a covered container and stick it back into the fridge until the next time you bake bread. 
2) Dump the other half...into a food processor. Yeah, I know. For some people this probably sounds like a heavenly prospect, while for others (myself included) it seems simply unthinkable. Machine-kneaded bread? What is this, the 1950s? I love the hands-on element of bread baking. But, for sourdough at least, this really works. 
3) Add the bread flour, rye flour, yeast, and salt to the food processor and turn it on for about a minute. The ingredients should meld into a moist and well-defined ball. If it's too sticky, add flour a few tablespoons at a time. If it's too dry, add a little water.  Process for 5-10 seconds after each addition. 
4) Put the dough into a large bowl, cover with plastic wrap, and leave at room temperature for at least an hour.
5) Lightly flour a countertop, and shape the dough into a boule or a baguette or whatever you like, really. (To make a boule, form the dough into a ball and then stretch it by lightly pulling the dough from the center out to the sides and tucking it under. Make a "seam" on the bottom of the loaf by tightly pinching the tucked-under bits together.) Cover with plastic wrap or a damp towel and let it rest and rise while you pre-heat the oven to 400°F. 
6) When the oven is pre-heated, transfer the loaf to a greased baking sheet and score it a couple times with a sharp knife. Turn the oven down to 375°F and put the bread in. Make sure there's not a baking rack too close above the one the bread is on, because these loaves PUFF, I tell you. 
7) Unlike most bread recipes, which specify a baking time, Mark Bittman recommends an internal thermometer.  He says that the internal temperature of the loaf should be at least 210°F, which for me meant baking the bread past its initial "golden brown and hollow sounding" stage. What looked and felt like a done loaf was, according to Mark Bittman, 20 degrees shy of where it needed to be. So, if you have a thermometer, use it; if not, bake the bread longer than you think you need to--probably at least 40-50 minutes, although each oven is different. 
8) When the bread has reached the desired temperature, stick it on a rack to cool, slice in, and smile. You've just made sourdough.