Showing posts with label Italian. Show all posts

Saturday, October 17, 2015

Sun-dried Tomato and Brussels Sprouts Carbonara

Hi. This is not a healthy post. In fact, it's a decidedly unhealthy post. But this week I had to get some blood work done, and apparently I've got such great cholesterol levels they warranted an exclamation point in my doctor's notes, so I've decided that for tonight my tastebuds are gonna beat my health sensibilities. Tonight, my friends, we make carbonara.


The first time I remember anybody around me eating carbonara was during my first time in NYC when I was 11. My dad took me along on a business trip. We went to see "Beauty and the Beast" on Broadway, and before that we got dinner at some Italian place, because I was the pickiest eater known to man at that time in my life, and I probably needed to find pasta with butter and parmesan cheese and possibly broccoli. Truth be told, I have no memory of my dinner from that evening, but I do remember my dad looking very pleased as the waiter came over, cracked an egg into a dish, mixed it up, mixed it into a hot pasta concoction, and placed the whole thing in front of my dad. I thought it was disgusting. My dad thought it was delicious.

Well, I'm no longer 11, and although I only experienced authentic, meaty carbonara on a couple of occasions before deciding to be a vegetarian, I know it's good. So's this. The sun-dried tomatoes add a flavor burst that, while not mimicking pancetta in flavor, gives a similar zingy effect. The egg and half-and-half are just as creamy as could be, and once you put parmesan in anything it gets 1000 times better, yeah? The brussels sprouts were more of an afterthought for me. I like putting veggies in my pasta for diversity of texture, and I thought this could be a nice change from the typical spinach and mushrooms.


Ingredients

  • 1/2 lb brussels sprouts, washed, ends trimmed off
  • 1 tbs butter + 1 tbs oil, or 2 tbs of one or the other
  • 3 cloves garlic, thinly sliced
  • 6 oz pasta of choice
  • 1/4 cup diced sun-dried tomatoes (mine were dry, not oil-packed, but either will work)
  • 2/3 cup half and half, cream, whole milk, or a combination (the consistency of the final sauce will be thicker the higher the fat content)
  • 1 egg
  • 2 tsp mustard
  • 1 tsp dried basil
  • dash garlic powder (optional)
  • 2/3 cup parmesan cheese (fresh is best. if you don't have it, use whatcha got)
  • salt and pepper to taste
Procedure
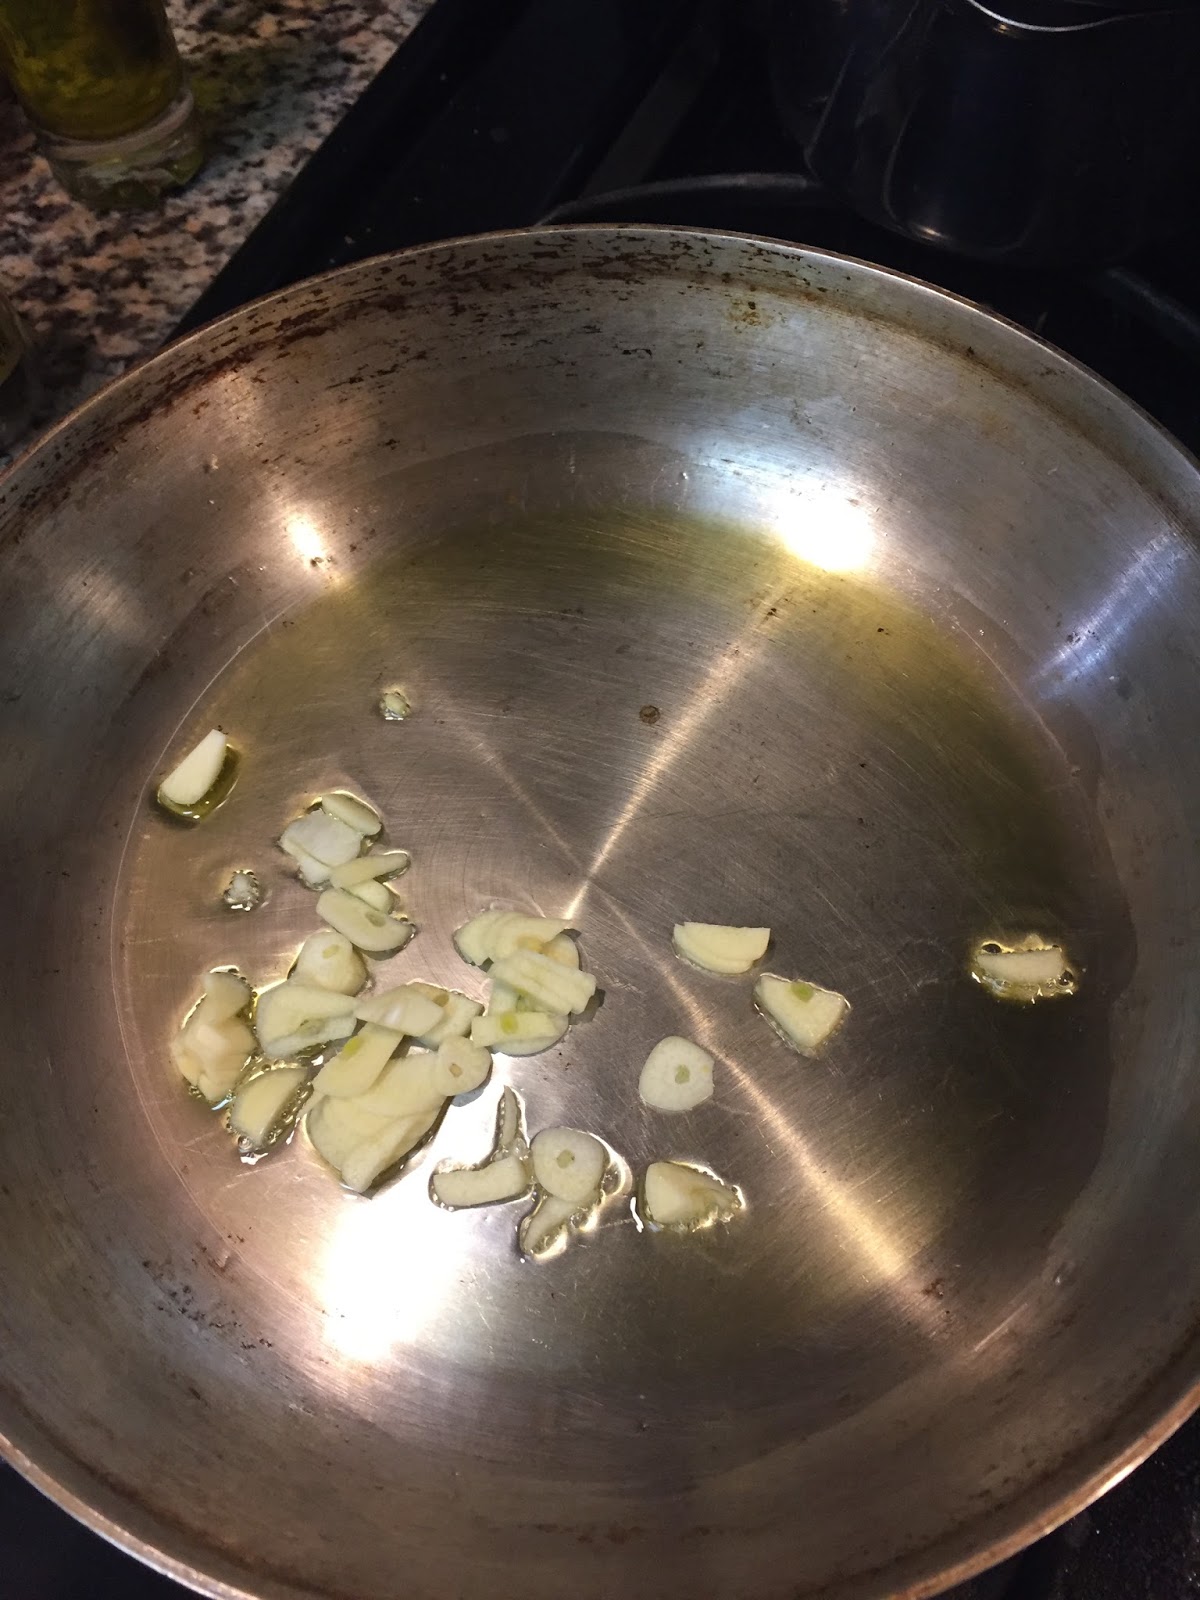
  • Melt the oil and butter together in a frying pan over medium heat. Add the garlic and cook, stirring, for a minute or two until fragrant. 
  • Place brussels sprouts into the pan, turn to low, and cover. Let cook for 15-20 minutes, stirring occasionally, until sprouts are crispy on the outside and tender on the inside. 
  • before
    After
  • While the sprouts are cooking, cook your pasta.
  • Mix half and half, mustard, egg, and a dash of salt and pepper together
  • When the pasta is done, drain (but don't rinse!) and add to the sprouts. Pour in the egg mixture and add in the basil, tomatoes, and cheese. Cook over low heat, stirring, until the mix comes together (about a minute). Eating undercooked eggs is scary. Eating pasta with scrambled eggs is not the goal. Use your best judgement. Taste and add salt and pepper and/or more cheese as needed. Serve and enjoy.


Friday, October 2, 2015

Pasta with Burst Tomatoes


So it's fall. And that's great. That's really great. But it being fall means saying goodbye to summer, and, with that, to many wonderful foods. I love little tomatoes. Cherries, grapes, mini heirlooms, whatever. You can still get them in the winter, but the ones in the summer are better on every level. So, normally,  I treat them as a summer-only food.

I wanted one last gasp of summer cooking, so when I went shopping a couple days ago I bought a box of little tomatoes, and then I burst them. The results were simple and delicious.

Ingredients
  • a couple glugs of olive oil
  • 3 large cloves garlic, sliced
  • 1/2 tsp dried basil
  • 1/4 tsp dried oregano
  • a handful of fresh basil, if you've got it
  • 1/2 lb small tomatoes
  • 1/2 lb pasta
  • salt and pepper to taste
  • grated parmesan, romano, asiago, or any other cheese you like for serving
Procedure:
  • Cook pasta according to package directions. Make sure to save a bit of cooking water. While it's going:
  • Heat a glug of olive oil over medium heat. Add the garlic and dried basil and oregano and cook, stirring, for a few minutes, until it starts to soften.
  • Add in the chopped basil, another small glug of oil, and tomatoes and turn the heat up a bit. Let the tomatoes cook for 5-8 minutes, stirring  until they start to crinkle and burst at the seams. 
  • Into the Pan
    2 minutes in
    5 minutes in
  • Drain the pasta if you've not already done so and stir about a half cup of the cooking liquid into the tomatoes, letting the tomatoes begin to absorb it.
  • Mix the pasta into the tomatoes and give it a minute to all come together. 
  • Season with salt and pepper, and pass the cheese please!


Friday, September 4, 2015

First-Week-of-the-Second-Half-of-Rabbinical-School Pasta

This seems to happen every year. In the Fall, I get grand ambitions of the food blogging that I shall revive, of the recipes that I shall post, of the deliciousness to be documented. And then, inevitably, school and work take over, and the blogging stops almost before it starts. Well, not this year. It is now my second half of rabbinical school. I can do things like chant Torah and talk about modern Jewish history and even maybe tell you what month it is in the Hebrew calendar. I can keep up with this blog, and I shall.

To begin, I'll be sharing a First-Week-of-the-Second-Half-of-Rabbinical-School Pasta.

My lovely roommate works for a synagogue that hosts a CSA pick-up. It's a great idea! As a nice bonus, when there's leftover produce from the boxes, Sara gets to take some of it. Last week she brought home beautiful eggplants and red peppers, and she was nice enough to share them with me.

Eggplant is delicious. Often when I get eggplant, I'll make a Chinese dish called 红烧茄子 (Hong Shao Qiezi), which is just about the most delicious way to eat eggplant ever. But, not knowing that Sara was going to be bringing eggplant home, I'd bought my own a few days earlier and already cooked up a batch, so I was looking for something different.

I experiment in the kitchen. Most cooks do, I guess. For me, it's a creative outlet and something very tactile in a life that's largely not. Much of my day consists of reading and listening and talking. I like reading and listening and talking very much! But I also have to find ways to keep my body engaged. I knit in class. I fidget. I play with my hair (curly hair makes it easy). Often, when I get home after a long day, the possibility of going into the kitchen and playing with my food is about the most enticing thing there is.

So, without further adieu, here's what I came up with. It's vegan unless you add parmesan at the end, and if you sub gluten-free pasta it'd be gluten-free. :)


Ingredients:

  • several generous glugs of olive oil
  • 1 large globe eggplant, sliced into finger-sized pieces
  • 1 small red pepper, diced
  • 1 small yellow onion, diced
  • 2-5 cloves of garlic, diced (I love garlic. If you don't, put in less)
  • 1 handful of mushrooms, stemmed and sliced
  • 1/2 tsp. dried oregano
  • 1 tsp. dried basil (if you have fresh, all the better!)
  • 1 14-oz can diced tomatoes
  • 1/2 tsp. sugar
  • 1/2 lb pasta of choice
  • salt and pepper to taste
  • (optional) parmesan cheese
  • (optional) fake meatballs-- or real ones, if you don't keep kosher/do eat meat

When I set out to make this, I had limited time because I had only about a half hour at home before a dinner-time (but not dinner) meeting. So I  got home from school, chopped my veggies, threw them in a box in the fridge, and drove off to work. 


Once I got back, it was play time. There's an eggplant dish called "pasta alla norma" that's pretty delish. I like to use a light variation on Jamie Oliver's recipe. I started out with this much the same way, cooking the eggplant in batches, but then I got all excited about my other ingredients and went off-book. Approximate procedure is below, but, as always, play!

Procedure:

  1. Fry Your Eggplant: heat a large skillet over medium, give it a nice drink of olive oil (probably a couple of tablespoons), and add as much of the eggplant as you can fit in a single layer. (You may need to do two batches.) Stir some, but you want to leave it still long enough for the eggplant to brown. Once the eggplant's beginning to soften and turn golden, add a little salt and the basil and oregano. You may also need to add a little oil if it starts to stick. Keep tossing it around so it all cooks evenly. You can use the back of a spoon or a spatula to smoosh the eggplants and release some of the oil back into the pan. If necessary, remove the first batch and add in the second.
  2. Once the eggplant is starting to look mostly done, add it all back in, along with the onion and garlic. You may need to turn the heat down a tad at this point so that the onion doesn't scorch. Let it cook, stirring occasionally, until the onion begins to soften, then add the pepper and mushrooms. 
  3. Cook the veggies until the shrooms are shrunken, adding a touch more oil if needed to prevent sticking. Taste the veggies and add salt and pepper to taste. This is also a good time to get the water for your pasta going.
  4. Add in the can of tomatoes, along with a few tablespoons of water. Stir so that everything is incorporated. If you're using frozen meatballs (or fake meatballs), add them in now so that they can cook. 
  5. Turn the heat to low and let the sauce simmer for about 15 minutes. If it gets too thick (and it probably will), stir in some of the cooking water. Taste for spice and adjust as necessary. 
  6. Once the pasta is done, drain, reserving a little of the cooking water in case the sauce is still too thick. Spoon pasta into bowls, top with sauce and cheese (if desired), and dig in. 

Friday, July 6, 2012

Pasta with Summer

Yes, I will claim that the dish I'm about to post here is the quintessential summer spaghetti dish. I adore my pesto, and I enjoy many other summer pastas, but for a true summer pasta you gotta embrace the tomato, and it's gotta be quick.

So, I started with this (because it was just for me--if you're cooking for a crowd, double/triple/octuple appropriately):


A handful of chopped fresh tomatoes (mini-heirlooms from Trader Joe's in this case--if you've got fresh, use them!!), a handful of chopped basil from the garden, and a thinly sliced clove of garlic from the CSA. 

If I'd chopped the garlic smaller, I honestly could have had this sauce raw, but I like to cook just a little bit to mellow out the garlic, and my grandma has a habit of refrigerating tomatoes, which meant that cooking them could give them more flavor. Still, a light touch is important.

Put water up to boil and cook your pasta--I chose about 1/4 lb of straight up spaghetti (which made dinner and lunch-- 2 bowls like the size of the one pictured below), but feel free to use whatever shape you like, and adjust amounts accordingly. 

While your pasta's cooking (and do wait until the water's boiled and the pasta's in it, because you really don't need much time for this), throw a glug of olive oil into a small frying pan over medium-low heat. For me, a glug is about a TBS. Swish it around a bit and then add your garlic. You want it slowly sizzling so that it will cook but not burn. Toss in a couple strips of basil as well, to season the oil. 

When the garlic is getting really nicely aromatic, about 5 minutes into cooking, toss in your basil and tomatoes and cook just for a couple of minutes, stirring so everything blends. Season with salt and pepper, and perhaps a bit more oil if things start to stick. When the tomatoes are slightly softened, pull the sauce from the heat.

Drain the pasta and mix with the sauce. At this point, I threw in a bit of crumbled feta, but that's definitely optional. 

Sprinkle with parmesan, drizzle with oil, and smell the summer. 


Saturday, May 19, 2012

Pappardelle with Mushroom Sauce

There's something about mushrooms and pasta. I love mushrooms in stir-fries and curries, and when it comes to veggie burgers not much beats a properly marinated and grilled portabella cap, but pasta and mushrooms really do seem made for each other, especially when there's no meat involved.


So it was that, yesterday, I decided to make a pasta sauce with mushrooms and not much else. I happened to have brown crimini mushrooms and some dried porcini on hand, but I bet that this would be equally good (or better) with many different varieties. Having dried mushrooms is important though, because the water you rehydrate them in is a component of the sauce.

This doesn't take long to whip up at all, and it's delicious. I loved it with pappardelle, but any pasta would work fine, I'm sure.

Dried Porcini Mushrooms
Ingredients
-8 oz pappardelle or pasta of choice
-2 glugs olive oil (about 1-2 TBS each)
-1 large shallot, thinly sliced (you can sub half a small onion here if you'd like)
-generous sprinklings of dried parsley, basil, and oregano (if you have fresh, even better)
-3 medium cloves of garlic, minced
-about 12 oz fresh mushrooms, sliced
-1 generous glug (about 2-3 TBS) white wine--unnecessary but really good
-1/4 cup dried porcini mushrooms, rehydrated in 1 cup boiling water and chopped
-a couple handfuls of fresh spinach, stemmed and chopped
-salt and pepper to taste
-lots of parmesan, for serving


Procedure
1) Start preparing your pasta as directed--if you already have your sauce ingredients ready to go, the pasta and sauce should be ready around the same time
2) Place the dried mushrooms in a bowl and cover with the boiling water. Give them at least 15 minutes and up to an hour, really, to rehydrate. Don't throw away the water!
3) Swirl 1 glug of olive oil into a frying pan over medium low heat and add the shallots. Saute gently for a few minutes until they start to soften, then add about half of your minced garlic along with dashes of your herbs and a bit of salt.

4) If your pan looks dry, add your second glug of oil. Turn the heat up to medium high and stir in the fresh mushrooms and the rest of the garlic. My Dad says that when cooking mushrooms, the two important tasks are to keep them hot and keep them moving. So move that spoon around the pan, adding a bit more oil if you need to.
5) A minute or so into cooking, add your wine and give the alcohol a minute to evaporate. If your kitchen doesn't smell amazing at this point, there is either something wrong with your mushrooms or with your nose.
6) Turn the heat down to medium/medium low and throw in the rehydrated mushrooms. Start adding the mushroom water, but don't put it in all at once. You may not end up using it all. Let the sauce simmer. You don't want your mushrooms swimming in liquid, but they should be wading. Watch the sauce and add liquid accordingly. Let simmer for about 3-4 minutes, throwing in the spinach a minute or so from the end so that it just wilts. The mushrooms should be beautifully brown.
7) Season the sauce to taste, toss with the pasta and serve topped with lots of cheese. 


Thursday, May 10, 2012

Pizza!

Pizza's a big deal for me. I eat Papa John's and Pizza Hut on occasion, it's true, but in general I am indeed a pizza snob. The crust has to be appropriately thin, the toppings fresh, the cheese plentiful but not overwhelming. My go-to crust comes from the NYT and can be found here. The good news about the NYT recipe is that it makes a crust like no other-- very easy to stretch into shape and wonderfully crisp and golden once cooked. The bad news is that it requires a 24 hour+ rising period. So, when I'm planning on pizza, I go for that recipe. When I'm not, I hunt for another. I have yet to find my perfect "in-a-pinch" pizza dough. Yesterday, I decided to give Jamie Oliver's a try. Jamie's awesome, but the man loves his meat, so when I encounter a recipe of his that doesn't require flesh, I tend to jump on it.

My grandma absolutely loved the crust; she called it rich. I wasn't a huge fan. The dough tasted a bit sweet and was breadier than I like my pizza to be. It's not bad, but it's not fantastic either. The reason I'm blogging this pizza isn't so much for the crust as for the toppings, which I definitely intend to replicate on future pizzas. The crust recipe is here; I found halving it to be enough for 2 medium/largeish pies

For toppings, I went in two directions, opting for one traditional pizza with tomatoes, cheese, and veggies; and another with a white sauce, caramelized onions, and arugula. The traditional pizza doesn't require much prep work at all; the white pizza, due to the caramelized onions, needs to be thought up at least an hour before baking.

Also, sorry I don't have a lot of prep pictures. We were having company, and it was kinda awkward to play with the iPhone while chatting with guests. :)


Ingredients (Traditional)
-a sprinkling of salt and olive oil
-2 cloves of garlic, minced
-about 6 oz diced tomatoes, preferably fresh but canned will work too
-a handful of fresh basil leaves, torn
-8 oz of sliced mushrooms, sauteed in a little butter with a few torn basil leaves and a minced clove of garlic
-several sun-dried tomatoes, julienned or minced.
-7 oz of grated mozzarella
-1 oz feta cheese, crumbled
-black pepper to taste


Procedure
1) Pre-heat the oven as hot as it'll go. For me, that's 500°F. If your oven gets hotter, all the more power to you. If you're fortunate enough to have a pizza stone, make sure it's in the oven on the lowest shelf, so it can get nice and hot. If not, grease a baking sheet and stick it on the middle rack. Your pizza will be good--just not as good. On that note, I highly recommend investing in a stone. Even the cheapest ones (I think mine was $25 or so) make a big difference in quality, and they can be used to bake bread as well.
2) I find (clean) hands to be the best way to prep the pizza. Roll out half of the dough (if using Jamie's recipe) to a 1/4 inch circle, or whatever size necessary to fit your pizza stone or baking tray. Use your fingers to pinch the edges all around the dough, creating a ridged side the better to keep the toppings/sauce in place. Put the entire crust on top of a piece of parchment paper, unless of course you have a pizza peel. The parchment paper will ease the process of getting the dough in and out of the hot oven.
3) Start with the olive oil, sprinkling a bit on the dough and using your hand to rub it around. Add more oil if you can't get a little sheen all the way to the edges. Sprinkle on a dash of salt, followed by the minced garlic, the basil, and the tomatoes, trying to get even coverage.
4) Spread a thin layer of mozzarella over the dough, then add the mushrooms, sun-dried tomatoes, feta, and the rest of the mozzarella. Grind black pepper over the top.
5) Bake for about 10 minutes. The best way I've found to get the pizza into the oven is to put the pizza, on top of the parchment paper, onto a large cutting board, pulling the rack with the pizza stone or baking tray as far out of the oven as you can, and carefully tugging the paper onto the stone/sheet. Of course, you want to do this as quickly as possible to preserve the heat, but don't touch the stone or the oven or do anything else that will burn your hands! The crust will grow golden and the cheeses will bubble and perhaps even start to brown in spots.
6) Remove from the oven, let cool for just a moment, slice, and serve.


Ingredients (White)
-White Sauce:
      -1 TB butter
      -1 TB flour
      -1/2 cup milk (I used skim--use whatever you have)
      -2 cloves minced garlic
      -dashes of salt, pepper, and marjoram
-1 tsp lemon juice
-1 large onion, sliced thinly
-8 oz grated mozzarella
-1/4 cup parmesan cheese
-1 cup baby arugula, tossed in 1 tsp balsamic vinegar


Procedure (White)
1) Prep the caramelized onions. Essentially, you're allowing them to cook slowly enough to really release and celebrate the sugars inside. Take as wide-bottomed a pan or pot as you have and coat with about a TBS of olive oil or butter. When the oil shimmers, add your onions, stirring gently for a few moments, trying to get as many onions to retain surface contact with the bottom as possible. Allow the onions to cook on medium-low heat, stirring often enough to keep them from burning and seldom enough to let them brown. That turned out to be about every 5 minutes, on my stove. After the first 10 minutes, sprinkle the onions with a bit of salt and just the tiniest dash of sugar. The entire process should take at least 30 minutes and up to an hour. Just be patient, and when they look wonderfully brown, remove them from the heat.

Onions pre-caramelization
Onions 15 minutes into cooking
Caramelized Onions

2) Prep the sauce. Melt the butter in a small saucepan over medium heat and stir in the flour quickly, trying to avoid lumps. After a moment, pour in the milk, stirring well. Add a bit of salt and pepper and marjoram, along with the basil and garlic. Let the milk heat gently, stirring often. When it begins to bubble around the sides and thicken, cut the heat.
3) Prep the crust as described above.
4) Spoon the white sauce over the crust, spreading it evenly over the surface. Top with the onions and mozzarella, then sprinkle with black pepper.
5) Bake for about 9 minutes, then pull out of the oven, top with the arugula, and bake for one minute more before pulling out, letting cool very briefly, and serving.


Sunday, October 9, 2011

Sometimes Simple is Just Best- Pasta with Eggplant and Marinara

I'm behind on my blogging. Very behind. I have several good excuses, however. I started a new job, I spent two weeks cramming like mad for the Foreign Service Test, and I celebrated two of the most important Jewish Holidays of the year. Still, that doesn't change the fact that I've not been blogging and that's rather unfortunate. I'm now back at it and intend to stay that way!


My favorite smells in the world are fresh basil and freshly ground coffee (not at the same time, of course). Coffee, luckily, is something I can smell all-year-round in the States, but basil is about to slip out of my life for some months. I already miss it.

Georgia changes seasons a little later than the northern parts of our beautiful country, so it's only in the last week or so that we've started to experience real fall. The recipe I'm posting today was a supper cooked right on the edge of summer, peaking over into autumn, but it's the sort of thing that's good any time and super easy to throw together. To be perfectly honest, this isn't even the sort of thing I'd typically use a recipe for. It's more of a formula that can be changed up as needed to accomodate different vegetables and the like.

Ingredients
-1 lb box pasta of choice (I prefer shapes to spaghetti-type noodles for this sort of chunkier sauce)
-2-3 TBS olive oil
-3-4 Japanese eggplant, ends trimmed, cut into strips (I prefer Japanese eggplant, but traditional round eggplant will also work)
-dried basil and oregano (for the eggplant)
-2-3 medium tomatoes
-1-2 small peppers (red are great if you have them, but whatever works for you)
-2-4 cloves of garlic, minced
-sprigs of fresh basil, leaves removed and cut or torn into smaller pieces
-1-2 cups of commercial tomato sauce or 1 can of diced or pureed tomatoes, undrained
-salt and pepper to taste
-parmesan cheese, to serve


Procedure
-Prepare the eggplant: preheat the oven to 450°F, brush some olive oil onto a baking sheet, and place the eggplant strips on top. Brush the strips with more olive oil and sprinkle with salt, pepper, dried basil, and dried oregano. Use a spatula to flip the strips around and try to get an even coat. Bake 15-20 minutes, until soft and slightly crispy. If the outsides are too pale for your liking, you can use the broiler for a few minutes at the end, but watch carefully so they don't burn!
-While the eggplant is baking, put up a pot of water to boil and prepare the pasta. 
-Chop the peppers and tomatoes into medium-sized chunks (large dice, perhaps)
-Heat a saucepan and swirl in about a tablespoon of olive oil, along with a bit of salt (kosher or other coarse is great, if you have it)
-Add the garlic and cook over medium-low heat, letting it slowly cook without browning. After a minute or two, add the peppers and cook together, then throw in the chopped tomatoes and basil. 


-Let simmer for a few minutes until the vegetables start to break down somewhat but the peppers retain a bit of crunch.
-Stir in the canned sauce or tomatoes. I almost always use tomatoes for this, but it so happened that when I made this a couple weeks ago we had half a can of tomato sauce that really needed using up. If you're using canned tomatoes, you'll likely want to add more salt and perhaps more oregano, and a little drizzle of balsamic or red wine vinegar is lovely.
-Leave to cook for another few minutes, until warm and bubbly. Season to taste.
-Mix the drained pasta with the eggplant and sauce and serve with grated cheese, and perhaps a fresh-baked loaf of sourdough.